Master the “Home” Page
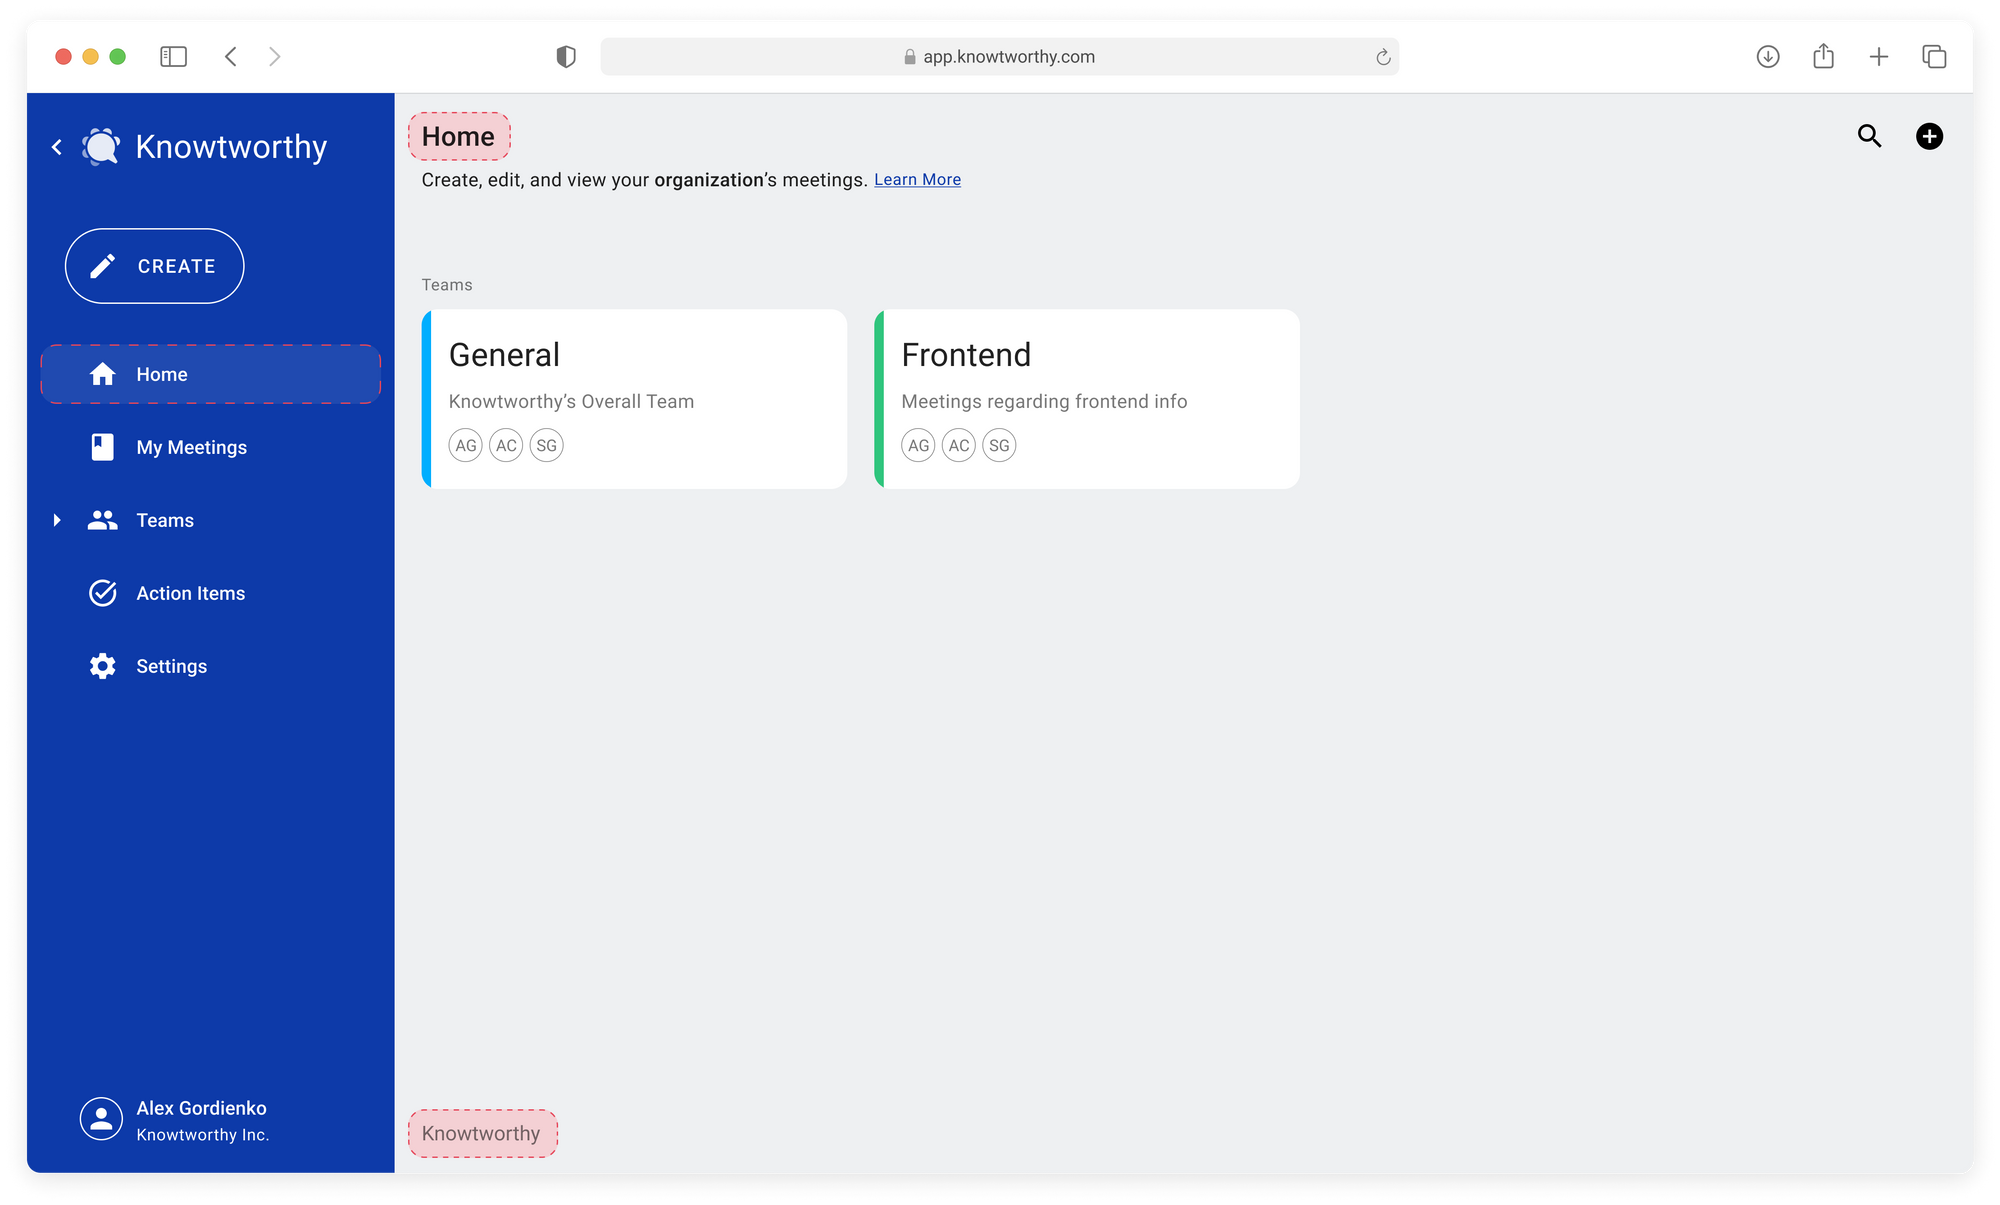
The Home page is the default page of your organization. From the Home page you will be able to see all of the teams you have been added to, and all of that team’s documents. Navigating to the Home page is a great way to reset your dashboard before starting to look for a specific meeting or folder. You can perform all of the same actions on the Home page as you can on your My Meetings page as well as a few extra ones!
Note: The Home page belongs to the organization you are a part of and the content that you see is moderated by an organization admin. To keep things clean, you will only see the teams that you have been added to, and any changes you make (such as updating, creating, or deleting a meeting) will be visible by other members of your organization so that you can use the space collaboratively!
What you will need
- An account with any Knowtworthy Plan
- Make sure that you have been added to at least one team of any organization.
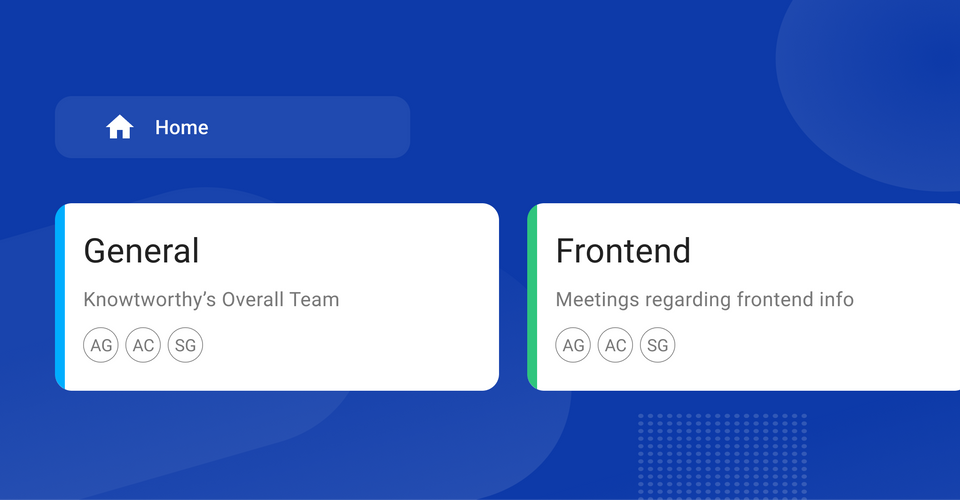
1. Navigate Home
Start off by making sure that you are on your Home page. This can be done by clicking on Home in the navigation bar. Once you are on the Home page, you will see your location in the breadcrumbs at the bottom of the page and the navigation menu will highlight your current location. Take a look at the image below and notice the areas highlighted in red to make sure you are in the correct location.
2. Creating New Meetings
When you first click on your Home page, you will see all of the teams that you are a part of. Since meeting minutes are always found within a team, click on the team you would like to create your document in first. Once you do this, you’ll notice that the “Create” button on the upper left of the page turns from disabled to active.
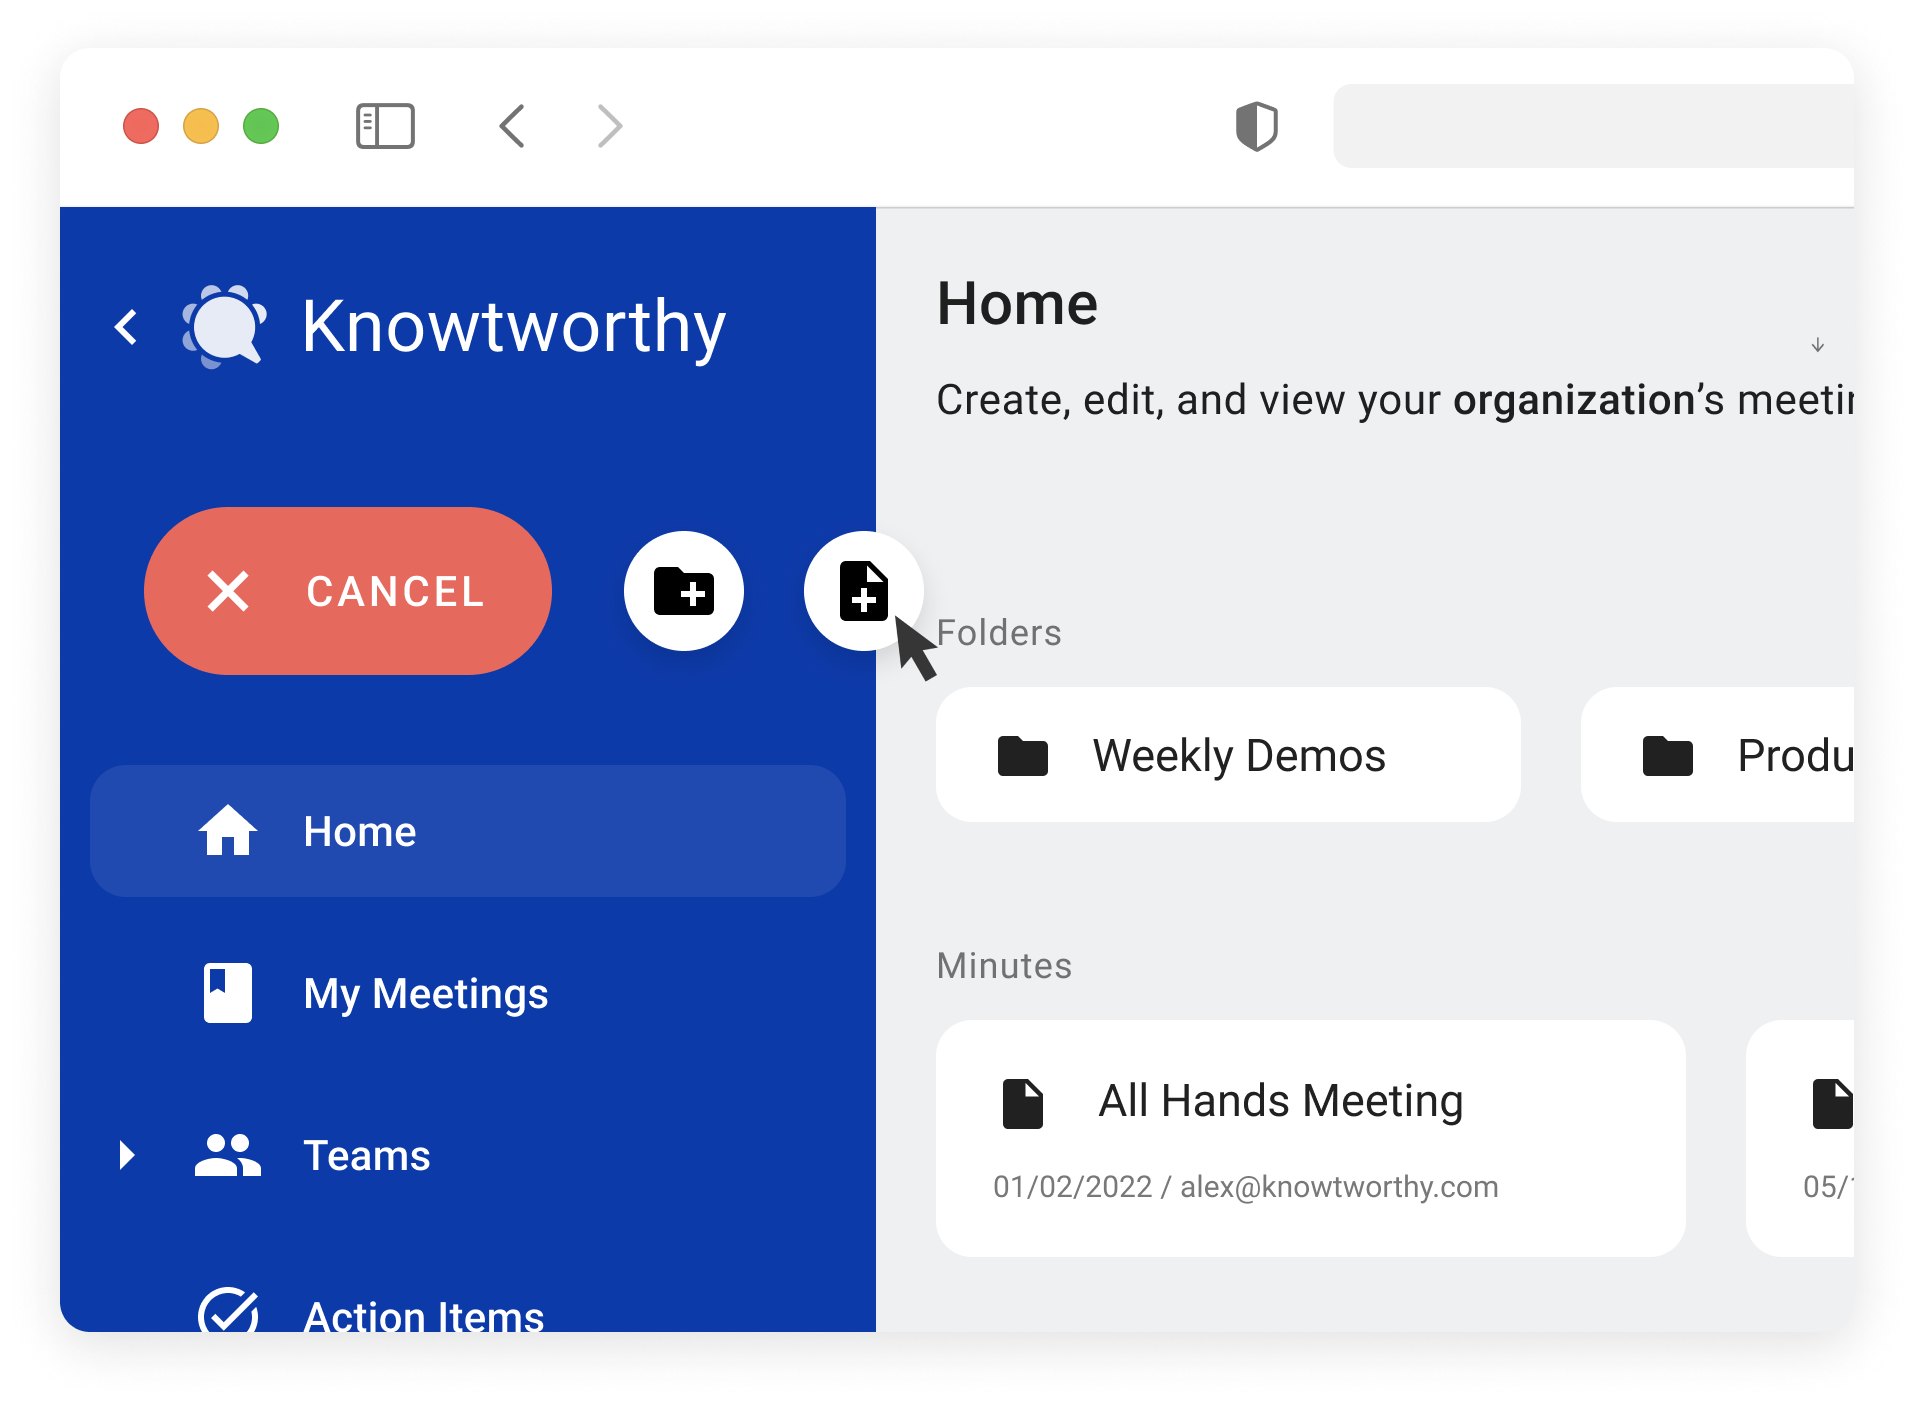
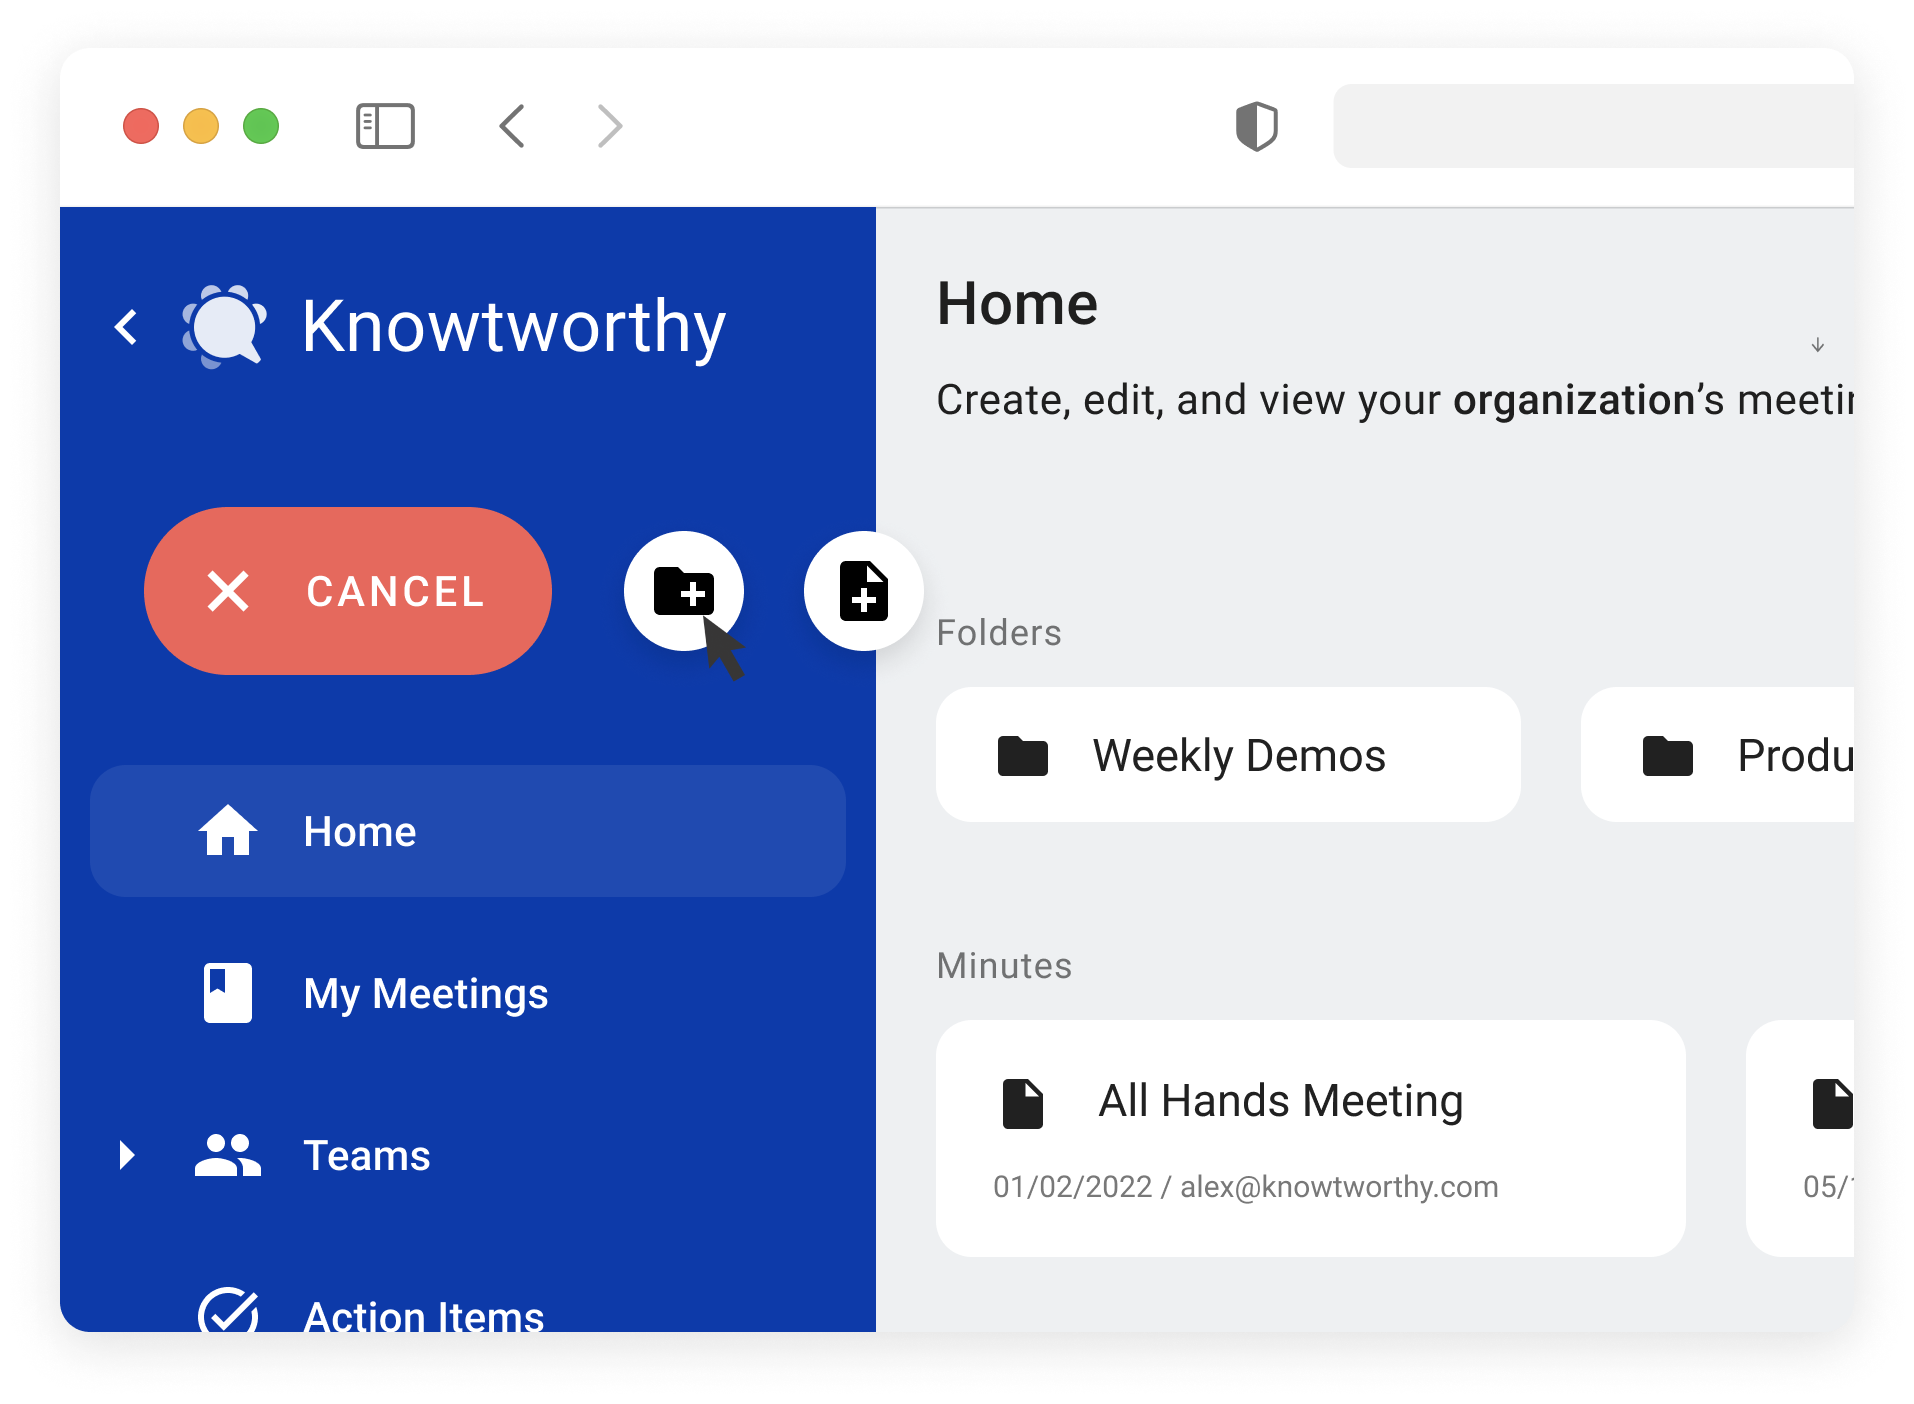
Creating a meeting is probably the most common action you will take on this page and it is super easy to get started. Once you are in a team and the “Create” button is active, simply click or hover over it and select the document icon labelled “New Meeting” as you see in the image below. A new tab will open up with your newly-created meeting notes and your Home tab will now display that new meeting note.
3. Creating New Folders
Next, you may want to create some folders to keep your team’s meetings nice and organized. To create a folder, click or hover over the “Create” button and click on “New Folder” as you see in the image below. You will be prompted to enter a name for your folder. Once you have written your name in the text box and clicked the “Create” button at the bottom of the popup, your new folder will be added to your page.
To open the folder, simply click on it and you will be redirected inside. Remember that you can always check where you are in your folder hierarchy by looking at the breadcrumbs at the bottom of your page.
4. Deleting Meetings or Folders
Sometimes you add a minutes document or a folder that you don’t really need and want to get rid of it. To delete any minutes document or folder, simply hover over the document or folder with your cursor until you see three dots appear on the right-hand side of the document or folder. Once you see the three dots, click on them and you’ll get a dropdown with a “Delete” button as you can see in the picture below.
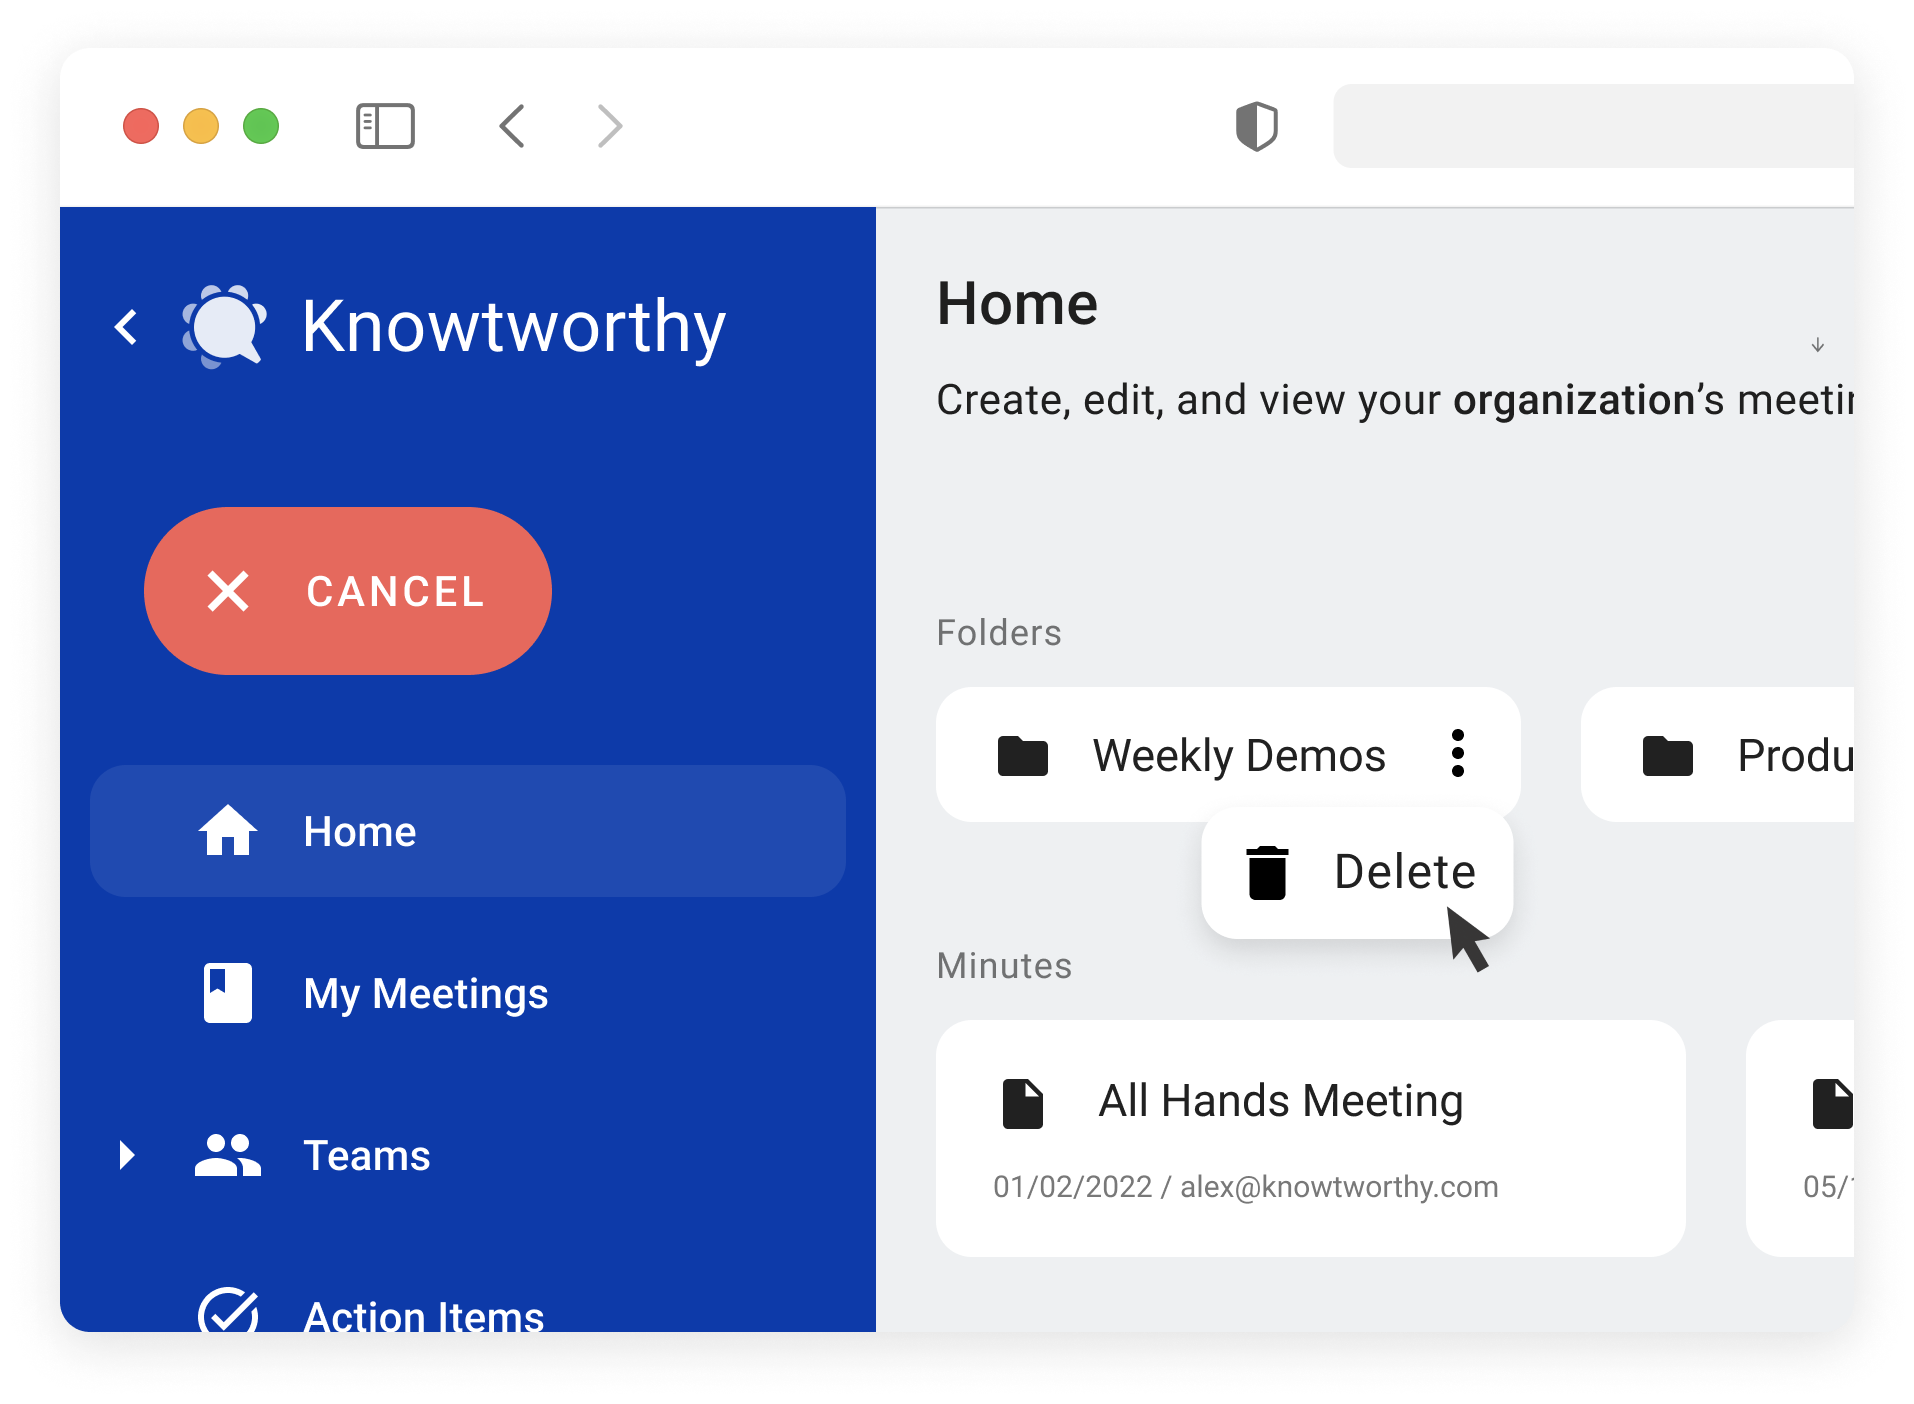
Once you click on the “Delete” button, your meeting or folder with disappear. Please note that this action is permanent and irreversible.
Note: In the interest of security, your meeting minutes and folders will be completely deleted as soon as you click the “Delete” button. Furthermore, if you choose to delete a folder that contains other meeting documents or folders, all of the contents of your chosen folder will also be deleted so please be careful!
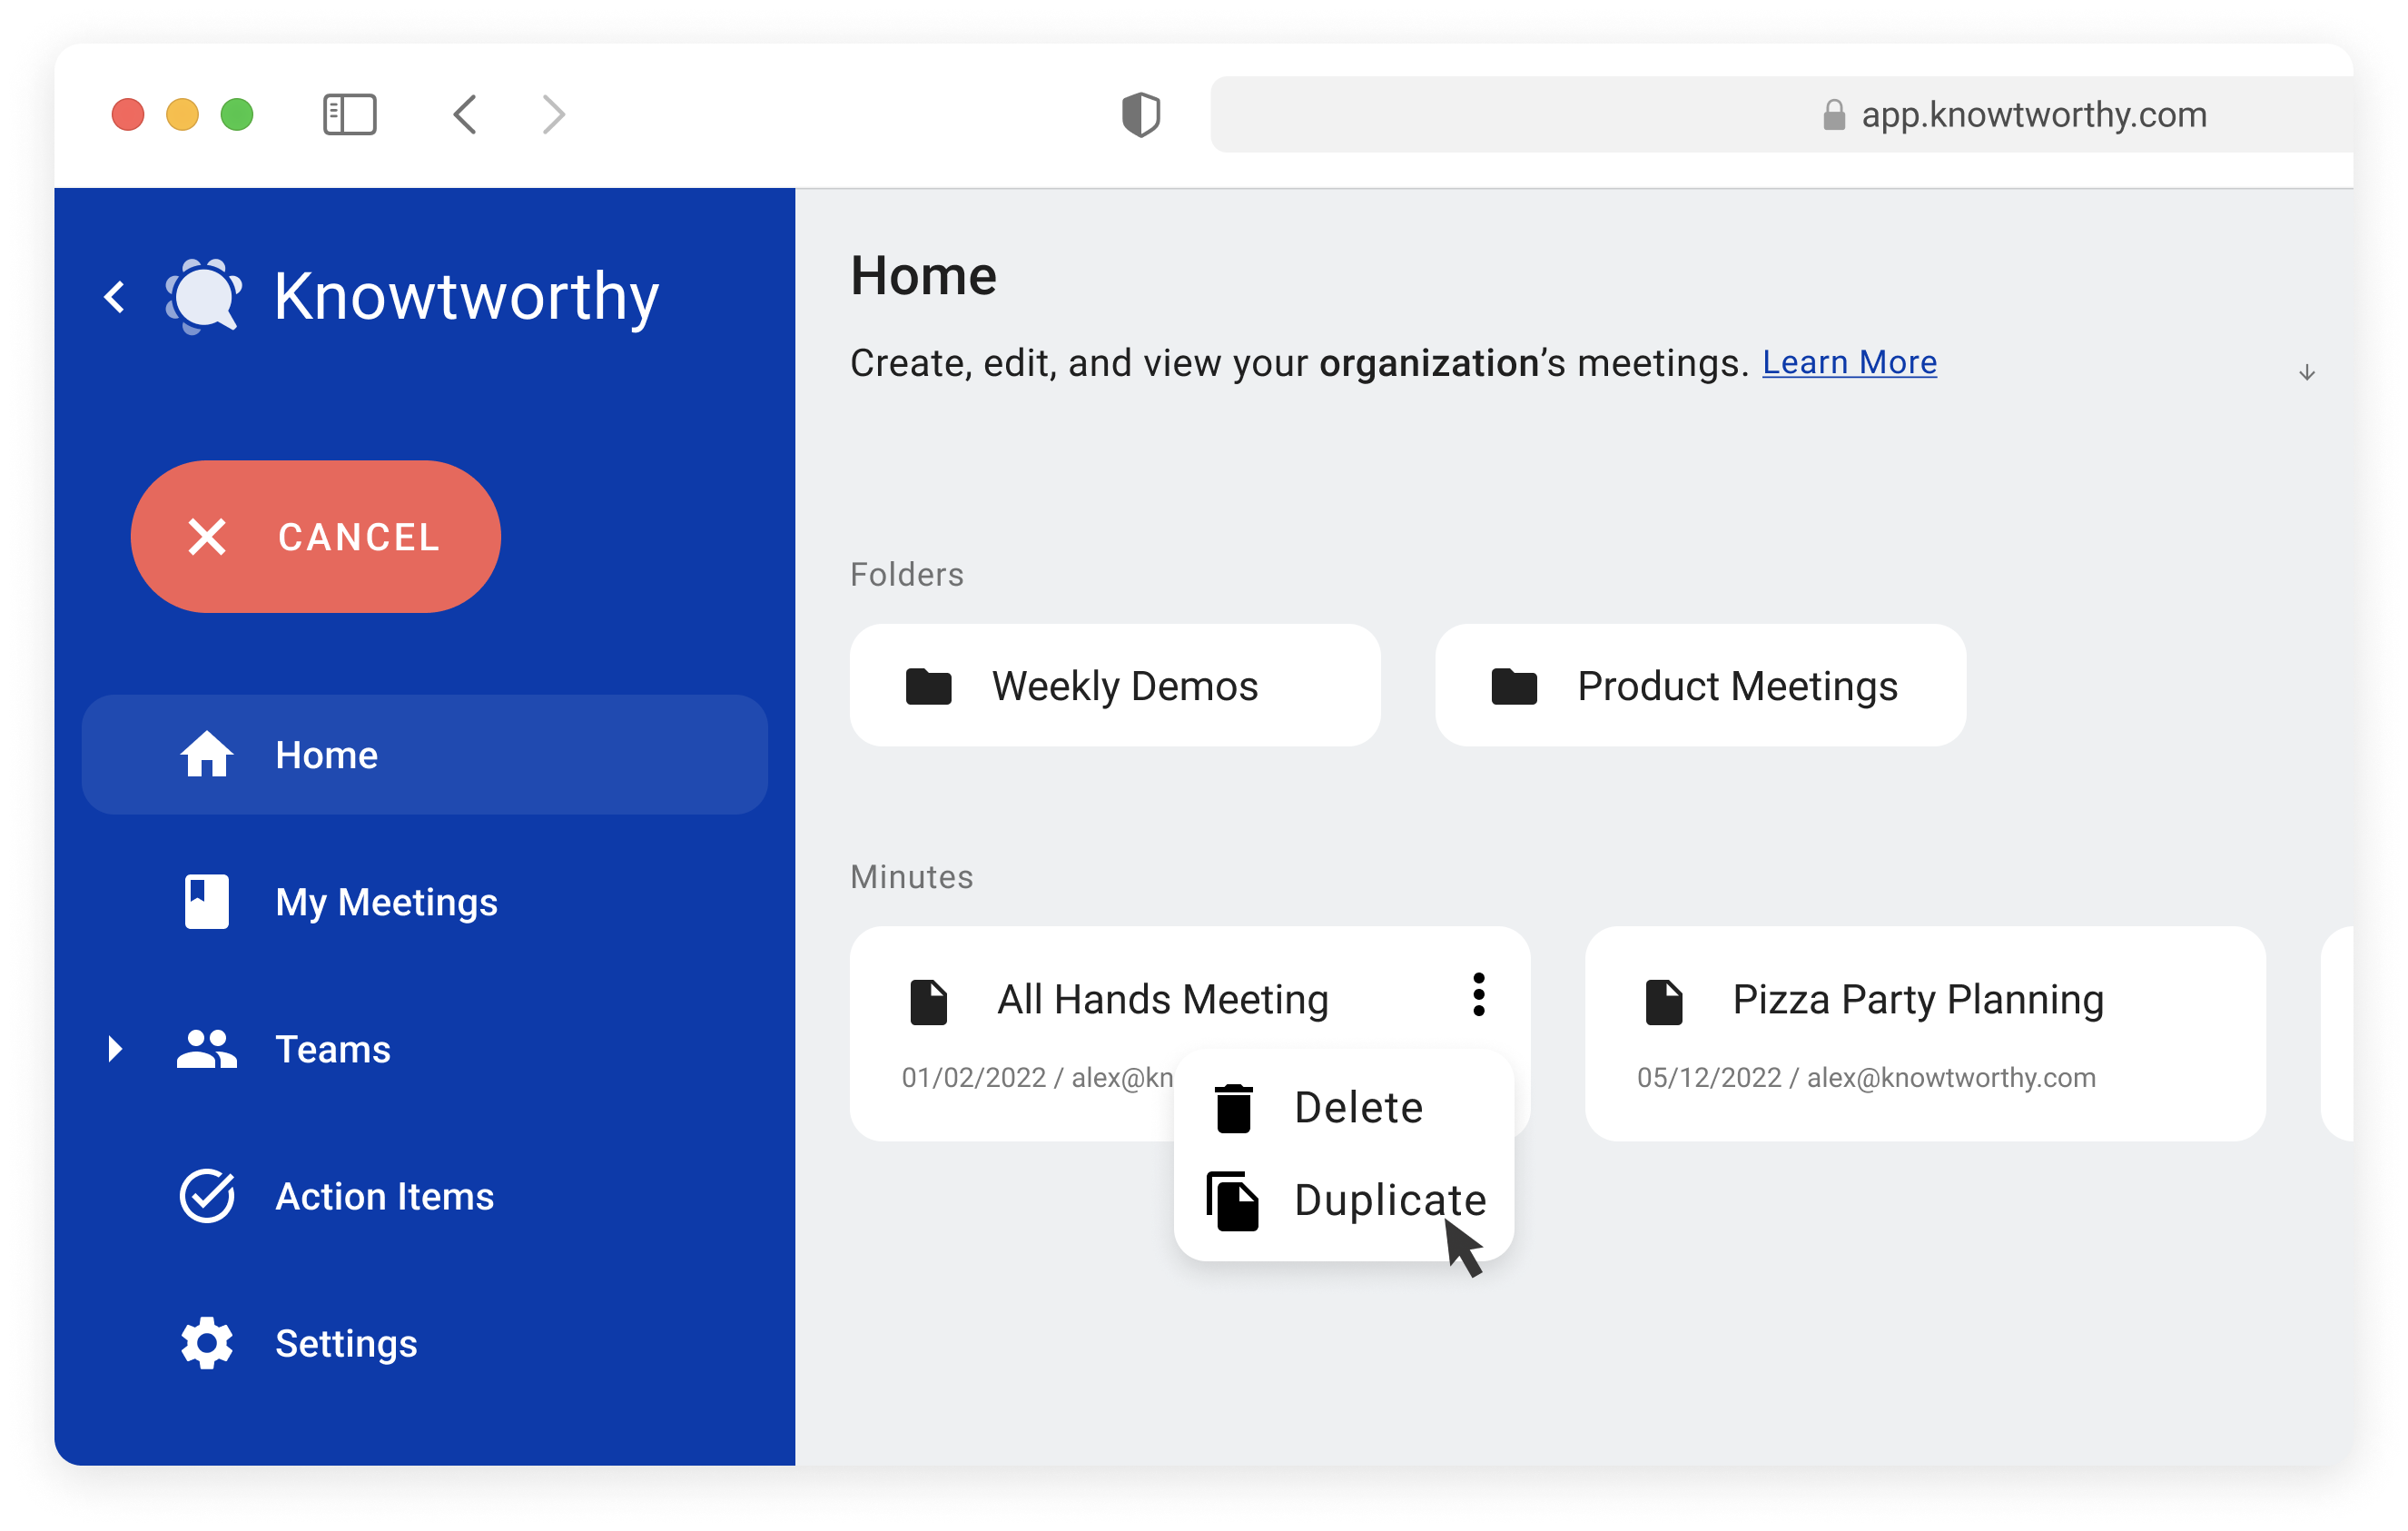
5. Duplicating a Meeting
Knowtworthy gives you the power to duplicate any meetings you have permission to edit, and this is very useful if you have recurring meetings that often follow the same template with the same agenda and recurring action items. For example, if every week you have a team demo where everyone presents in a particular order, you can create one meeting and duplicate it every week to save extra time setting up.
To duplicate a meeting, simply hover over the meeting with your mouse until you see three dots appear on the right-hand side. Click on those dots and you’ll see the option to “Duplicate”. Click it and your meeting and all of its context will be duplicated into the location as your original meeting. The title of the new meeting will be the same as the old one, but “[COPY]” will be prefixed. All meeting details will be copied over from your previous meeting with the exception of things like calendar invites so that you don’t accidentally send a duplicate invite for an outdated time.
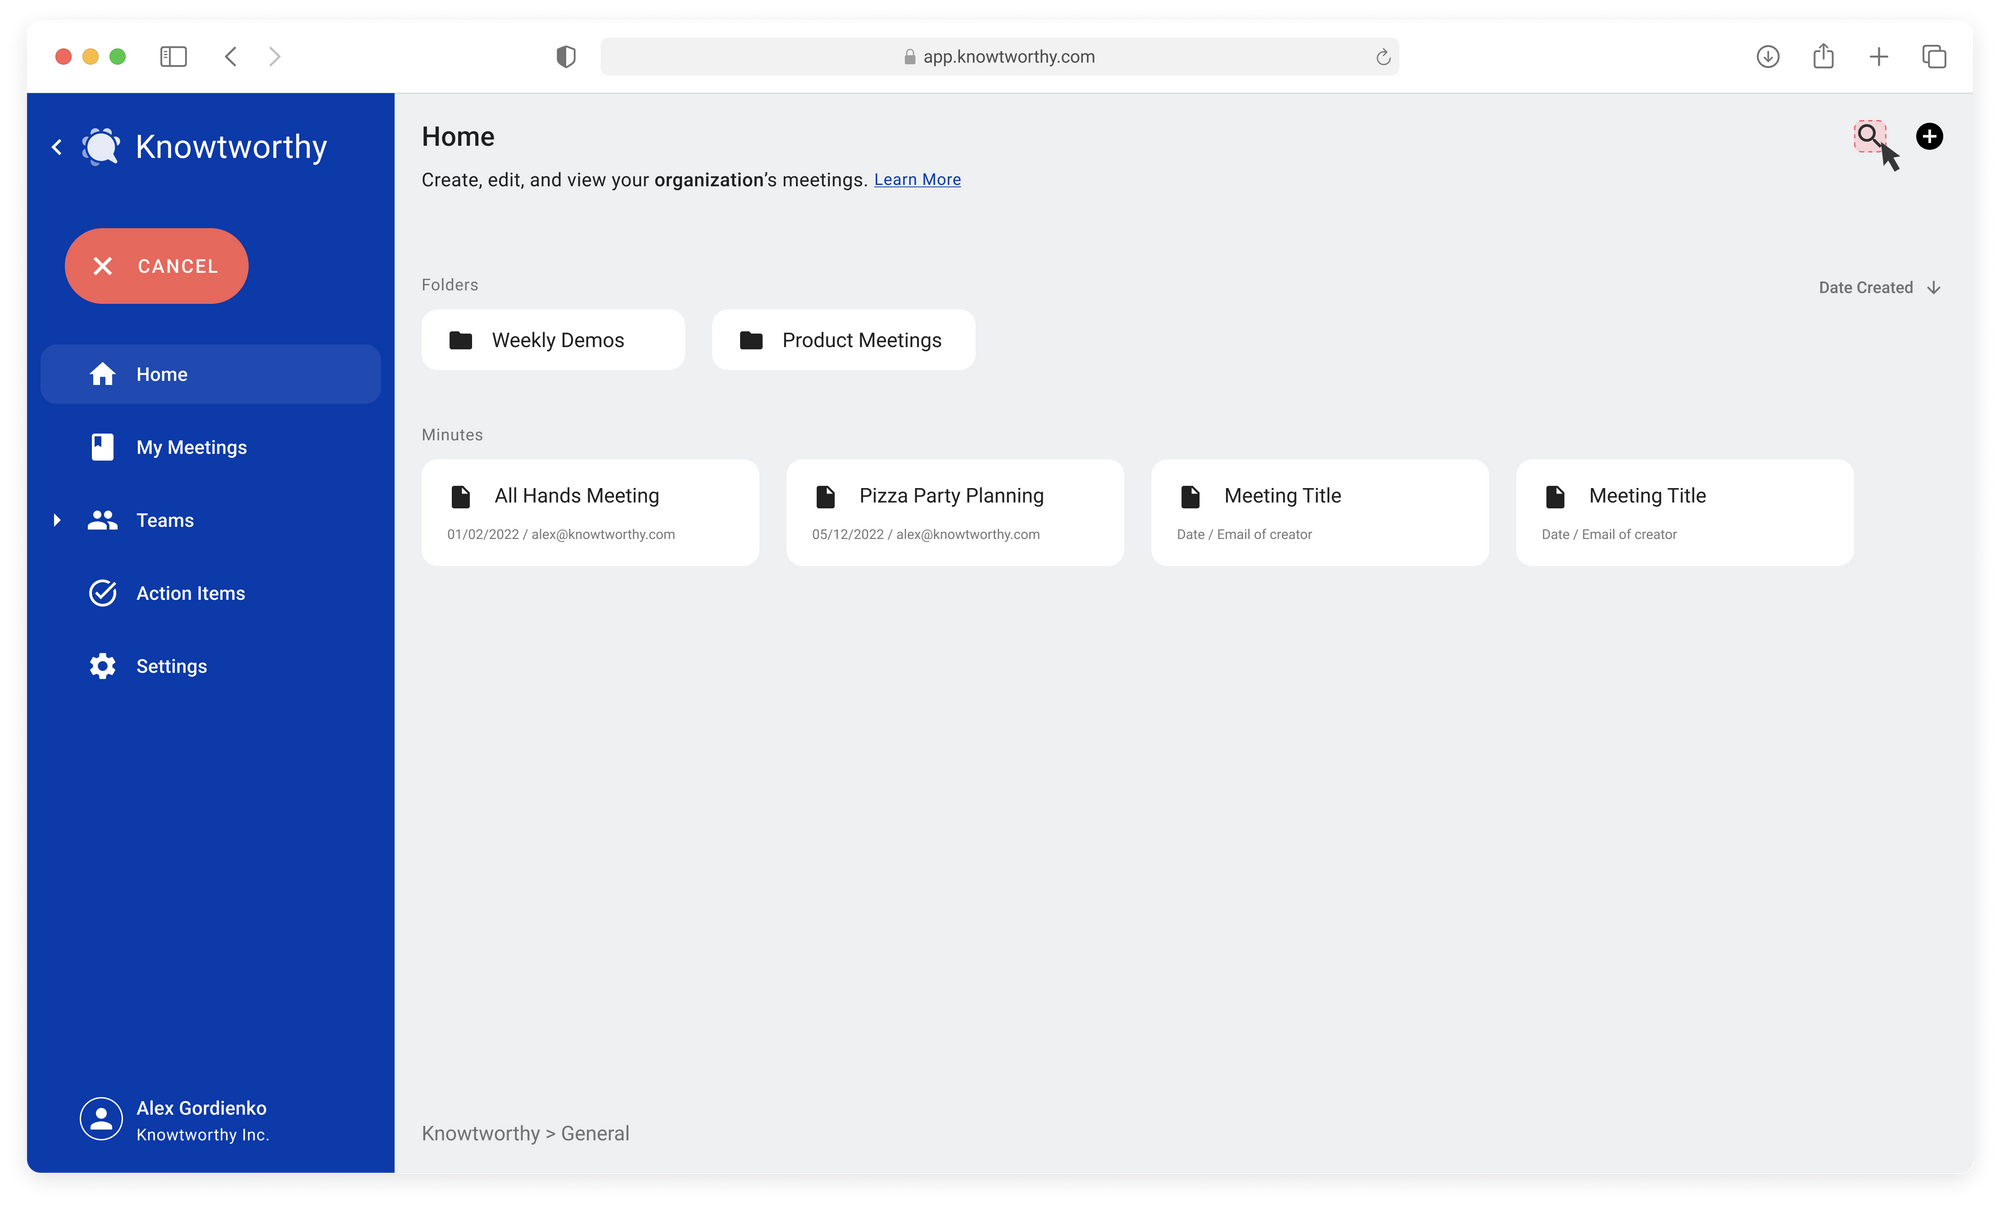
6. Sorting Your Meetings
As an added tool to keep your meeting documents clean and easy to use, you have the option to sort everything by Date Created, Meeting Date, or Name. To sort your meetings, simply click on the dropdown in the top right corner of your screen and select the option you would like, as shown in the image below.

Sorting by Date Created will order your meetings from earliest to most recent date of creation. You can see the date that the meeting was created on each meeting minutes card next to the person who created the meeting.
Sorting by Meeting Date will order your meetings from earliest to most recent date of occurrence. The date and time that you set within a meeting minutes document will be used when sorting. This is useful if you would like to order your meetings by the order in which they actually occurred.
Sorting by Name simply sorts your meetings alphabetically from A to Z. If you are ever looking for a particular meeting or you like labelling your meeting titles in a certain way, sorting by name can make finding the meetings you are looking for easier.
7. Search Meetings
The more you use Knowtworthy with your teams, the more the platform serves as a kind of internal knowledgebase. You’ll have important decisions, critical ideas, and more in your meeting minutes, and we want to ensure that you can always easily access all of this information. To accomplish this, we’ve added a smart search feature that you can use from within any team.
To start your search, simply click on the search icon in the top right of the screen as you see in the image below. You’ll see a search bar pop up and you can start searching for your meetings. Meeting titles and the corresponding minutes are searchable so feel free to search however you like.
A few notes about our search that will help you make the most of this feature:
- Search is context-specific. This means that you will be searching for meetings within a given team, not across an entire organization. This will help keep the results more focused and easy to go through as you create more and more meetings.
- Meetings are indexed periodically. We index meetings for searchability periodically, so you sometimes won’t be able to search for a meeting right after creating it. Simply wait a bit and you should see the meeting pop up in search soon.
8. Add Members to your Team (Team Admins Only)
Even though adding members to your team is generally accomplished through the team settings page as discussed in the article about getting set up, it would be convenient to quickly navigate to that experience directly from any team. To accomplish this, navigate to your team of choice and press the plus icon on the top right of the screen - as shown in the image below.
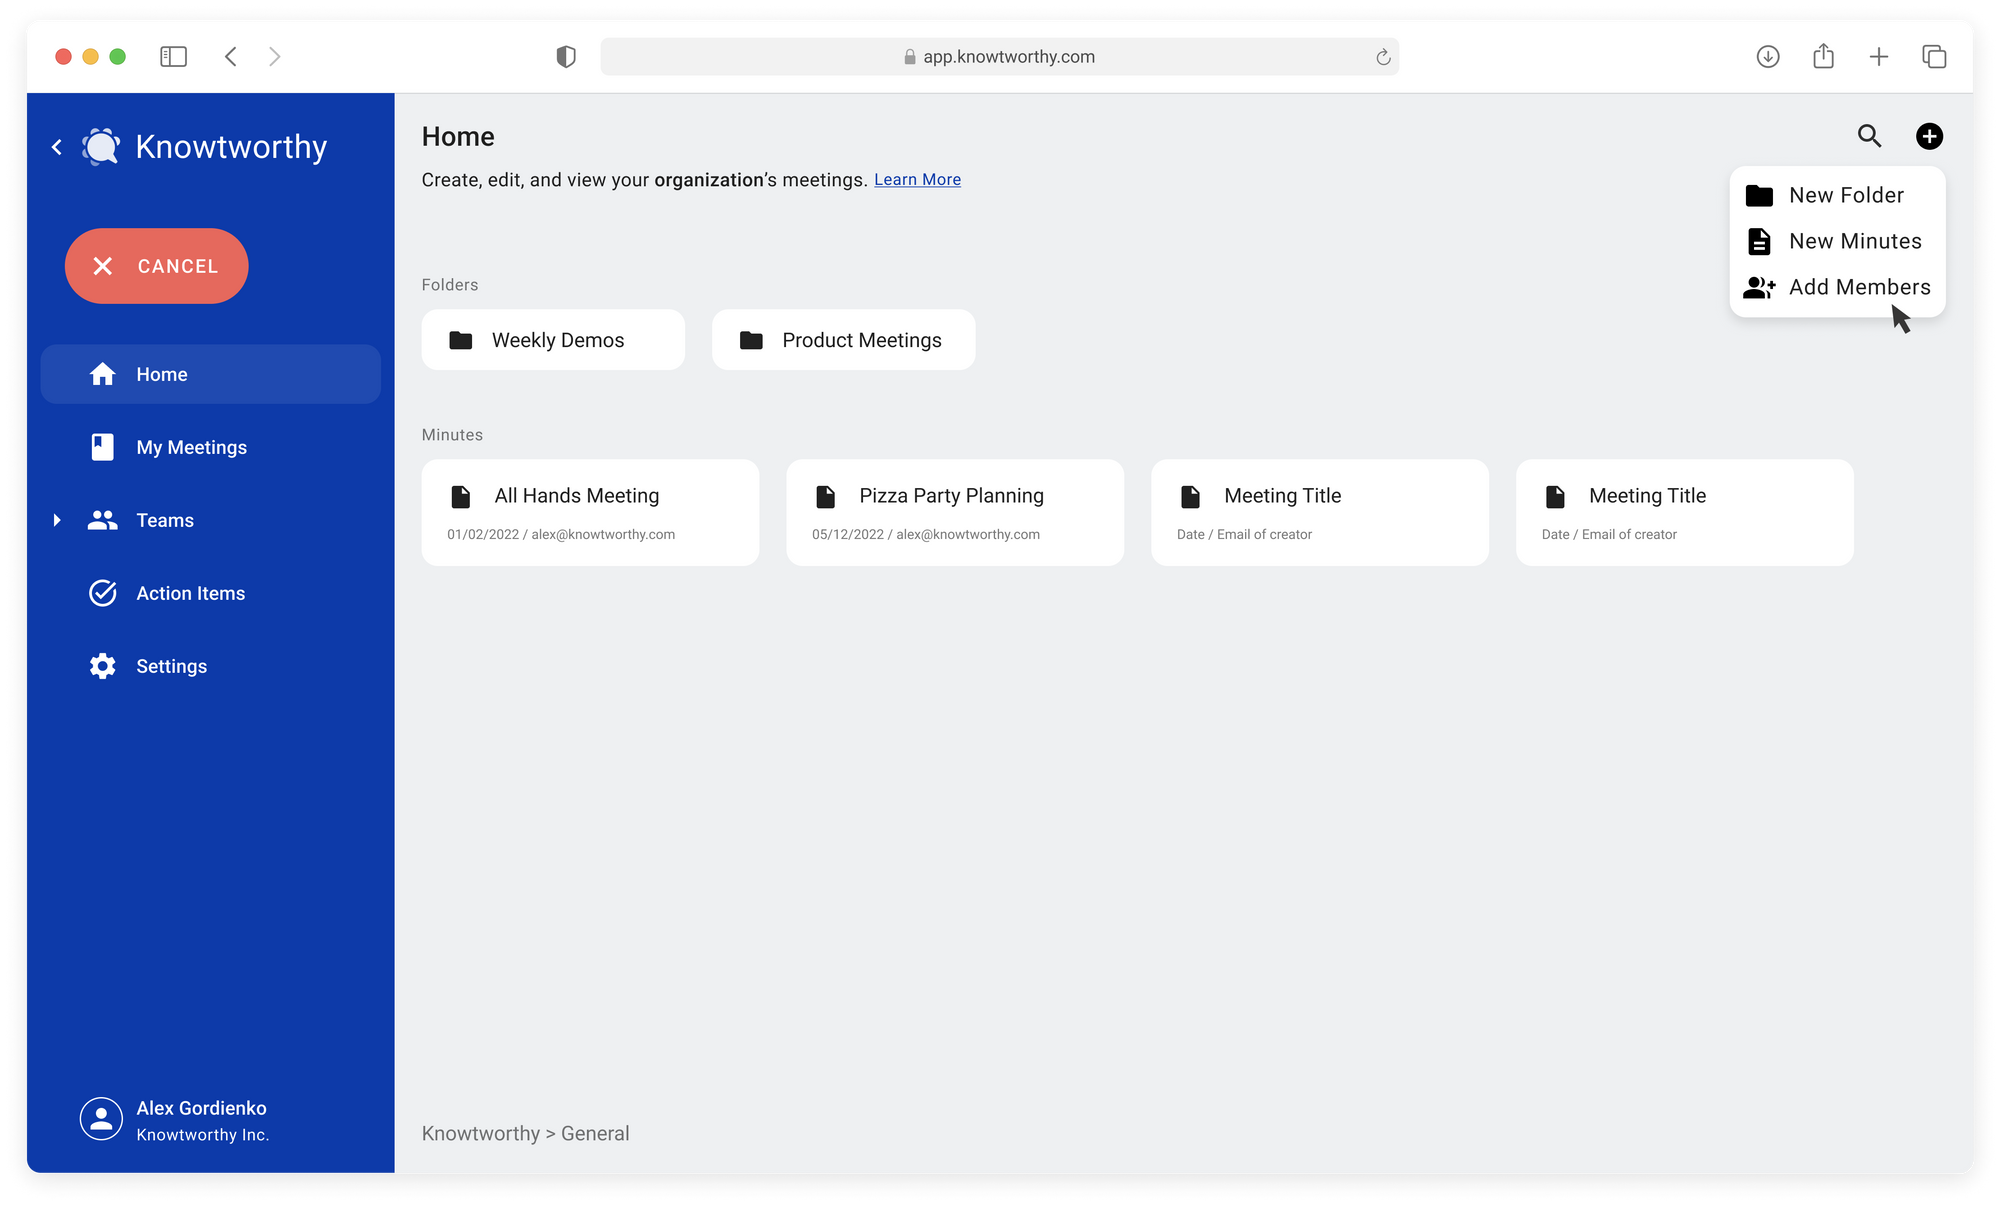
You’ll see a menu with three options, click the “Add Collaborators” option and you will be redirected to the setting page where you can add, remove, and edit team members. Once you are done with your changes, simply click the back button in your browser to head back to where you were.
That’s a quick overview of the kinds of things you can do on your Home page. This page shares a lot of similar features to the Teams Dashboard and My Meetings page, so feel free to check out the guide posts related to each of those.